Hi everyone! Trish Latimer here with my first of three projects this month. I am so excited to be part of the team as guest designer, and can't wait to show you some of my creations using Jennie's stamps and products! So, first up is this.......
A colourful, quirky frame! Lots of lovely messy paint, and plenty of stamps... Here is a quick step by step to give you an idea of how to create one of your own.
I like to work on a white base, so I've used
gesso to cover a
deep paper mache frame :
Of course you can leave the papier mache as it is, should you want the vintage, brown look in your piece!
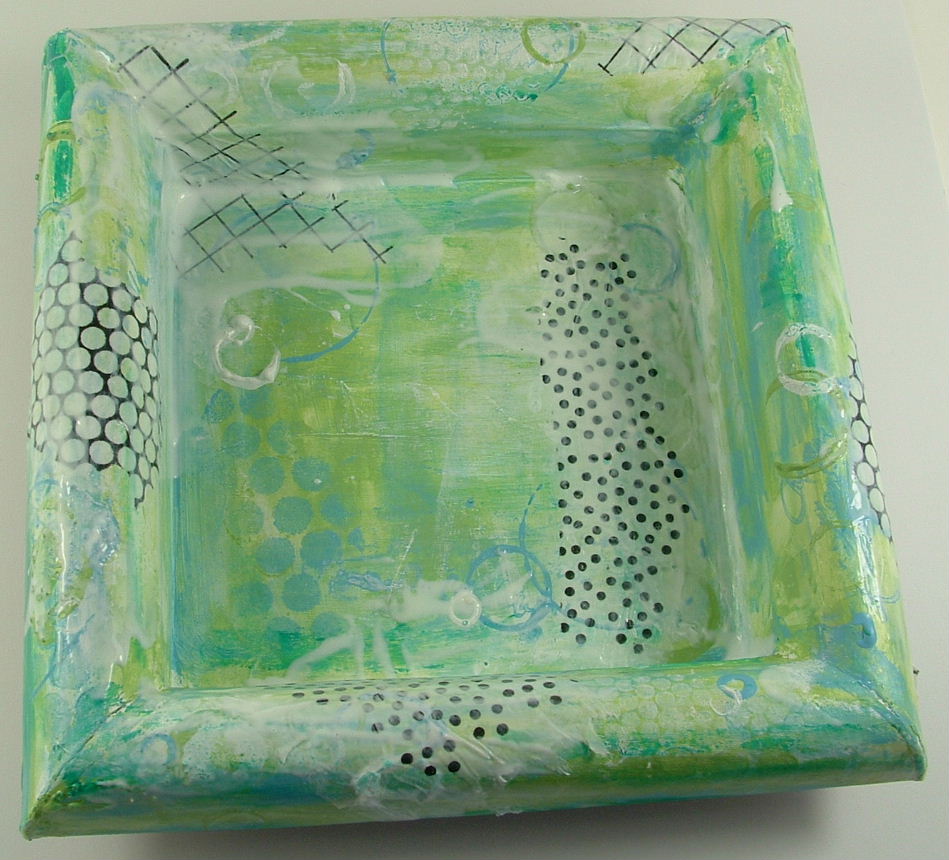
Next, get the paints out! Smear the whole thing with
Landscape Green and Sky Blue (by Claudine Hellmuth) and then print and stencil using bottle tops and sequin waste. I've also used a bit of
Blank Canvas paint as white is a great highlight colour. Stamp using a
Calligraphy Mat and elements from the
Swirls Splats and Dots plate. Something like this.....
Once this base is totally dry, add in some detailed stamped images. As the frame isn't flat, and we want the stamping to go around the corners, the only way to do this is to use tissue paper. Stamp
Open Sequin Waste, Random Dots and Grid Background onto white tissue using black ink, then heat to set. Tear the tissue and adhere to the base using Mod Podge wet glue. Like this...
You can clearly see all the wet glue on that pic...once the glue dries it will become clear, and the tissue transparent. The aim is for the stamping to look immaculate, even though it goes around corners! Add in some red paint (I've used
Dash of Red ) , and some more details using
Classic Teal . This will not only add a vibrant accent colour to your work, but will also help to 'blend in' your stamped tissue so it looks part of the piece.
Thats the background done! Using the same paint colours as before, colour some scrap card, then overstamp with
Butterflies . Cut out, then adhere a coil of wire to the back using hot glue.
The hot glue gun now becomes your best friend! Attach all the coils to the base of the frame, and put a tiny piece of card (shaped like grass) at the front to hide the glue!
I've used a digital collage image as my fairy, adding in some wings from a painted butterfly as before...
Finally, I typed a quirky quote, then printed it off and stuck it on. This hopefully brings the whole thing together!
I've loved making this as my first piece for you all to share, I hope you like it too! I'll be back later in the month with more....so bye for now!
Love, Trish


15 comments:
...a super first posting Trish & a fabby step-by-step to your piece, makes me want to get brave & give this a go...absolutely gorgeous...Mel :)
Trish, this is stunning! I must go find a glue gun... The butterflies look beautiful, and the frame is just gorgeous!!
Wonderful creation!!!
What a great art work!
greetings, Alie :-)
wonderful painty frame... ( Tissue paper is my best friend in the world of stamping. makes life so much easier.)
I love your frame.. LOVE it I say.... what a fantastic start to your Artistic stamper month!!!
Wow! such a stunning project! I love the butterflies on the coiled springs!!!
Enjoy your Artistic Stamper month and looking forward to seeing your other projects.
Wow!
Das ist ja der Wahnsinn!
Eine wunderschöne kreative Arbeit.
Chapeau!
Liebe Grüße
Fab project Trish !! Looking forward to your next piece !!
This is realy realy beautiful.
Greetings Janny
Wow Trish 'tis fabby :)
xoxo Sioux
This is a great first post Trish, love the way you have shown how it's done and the finished result is beautiful.
Stunning piece of artwork, Trish and as always, the colours you've used are beautiful.
We're so pleased to have you as our Guest Designer this month and can't wait to see all your work...
Love Emma xx
Magic and another Trish Treasure!!
Love it!
joZarty x
Gorgeous project, Trisha! Love how you've colored the base and thanks for sharing so many step-out pics.
I love these paper mache frames, I really like the 3D depth you have got on this, and the springy butterflys are great. Carol x
Post a Comment